Tuesday, April 7, 2020

Code Coverage for ROS

This is day 3 of my 2020 National Robotics Week blog marathon!

About two years ago I created a little package called code_coverage. This package is a bit of CMake which makes it easier to run coverage testing on your ROS packages. Initially it only supported C++, but recently it has been expanded to cover Python code as well.

What is Code Coverage?
Before I get into how to use the code_coverage package, let's discuss what coverage testing is all about. We all know it is important to have tests for your code so that it does not break as you implement new features and inevitably refactor code. Coverage testing tells you what parts of your code your tests actually test. This can help you find branch paths or even entire modules of the code that are not properly tested. It can also help you know if new code is actually getting tested.

The output of a coverage test is generally some really nice webpages that show you line-by-line what code is getting executed during the test:

Using code_coverage for C++
We will start by discussing the usage of code_coverage with C++ code first, because it is actually quite a bit simpler. C++ coverage can be done almost entirely in CMake.

First, update your package.xml to have a "test_depend" on "code_coverage" package.

Next, we need to update two places in the CMakeLists.txt file. The first change should be right after you call to catkin_package. The second change is where you define your test targets. You need to define a new target, which we will typically call {package_name}_coverage_report:

That's the configuration needed. Now we can compile the code (with coverage turned on) and run the coverage report (which in turn will run the tests):
catkin_make -DENABLE_COVERAGE_TESTING=ON -DCMAKE_BUILD_TYPE=Debug PACKAGE_NAME_coverage_report
You can find these same instructions (and how to use catkin tools) in the code_coverage README.

Using code_coverage for Python
Python unit tests will automatically get coverage turned on just with the CMake configuration shown above, but Python-based rostests (those that are launched in a launch file) need some extra configuration.

First, we need to turn on coverage testing in each node using the launch-prefix. You can decide on a node-by-node basis which nodes should actually generate coverage information:

Then we turn on coverage by adding the argument in our CMakeLists.txt:
add_rostest(example_rostest.test ARGS coverage:=ENABLE_COVERAGE_TESTING)
You can find this full Python example from my co-worker Survy Vaish on GitHub.

Using codecov.io For Visualization
codecov.io is a cloud-based solution for visualizing the output of your coverage testing. It can combine all of the reports from individual packages, as well as the C++ and Python reports into some nice graphs and track results over multiple commits:
codecov.io dashboard for robot_calibration
A Full Working Example
The robot_calibration package use code_coverage, codecov.io, and Travis-CI to run code coverage testing on every pull request and commit to master branch. It uses the popular industrial-ci package as the base line and then the following changes are made:
  • I set the CMAKE_ARGS in the travis.yml so that coverage is turned on, and the build type is debug.
  • I created a .coverage.sh script which runs as the AFTER_SCRIPT in Industrial-CI. This script runs the coverage report target and then calls the codecov.io bash uploader.
  • Since Industrial-CI runs in a docker, I introduced a .codecov.sh script which exports the required environment variables into the docker. This uses the env script from codecov.io.

Monday, April 6, 2020

10 Years of ArbotiX


This is day 2 of my 2020 National Robotics Week blog marathon! I've added a new label for Blast From The Past posts, of which this pretty much qualifies.

I've recently been sorting through some older electronics and came across this:

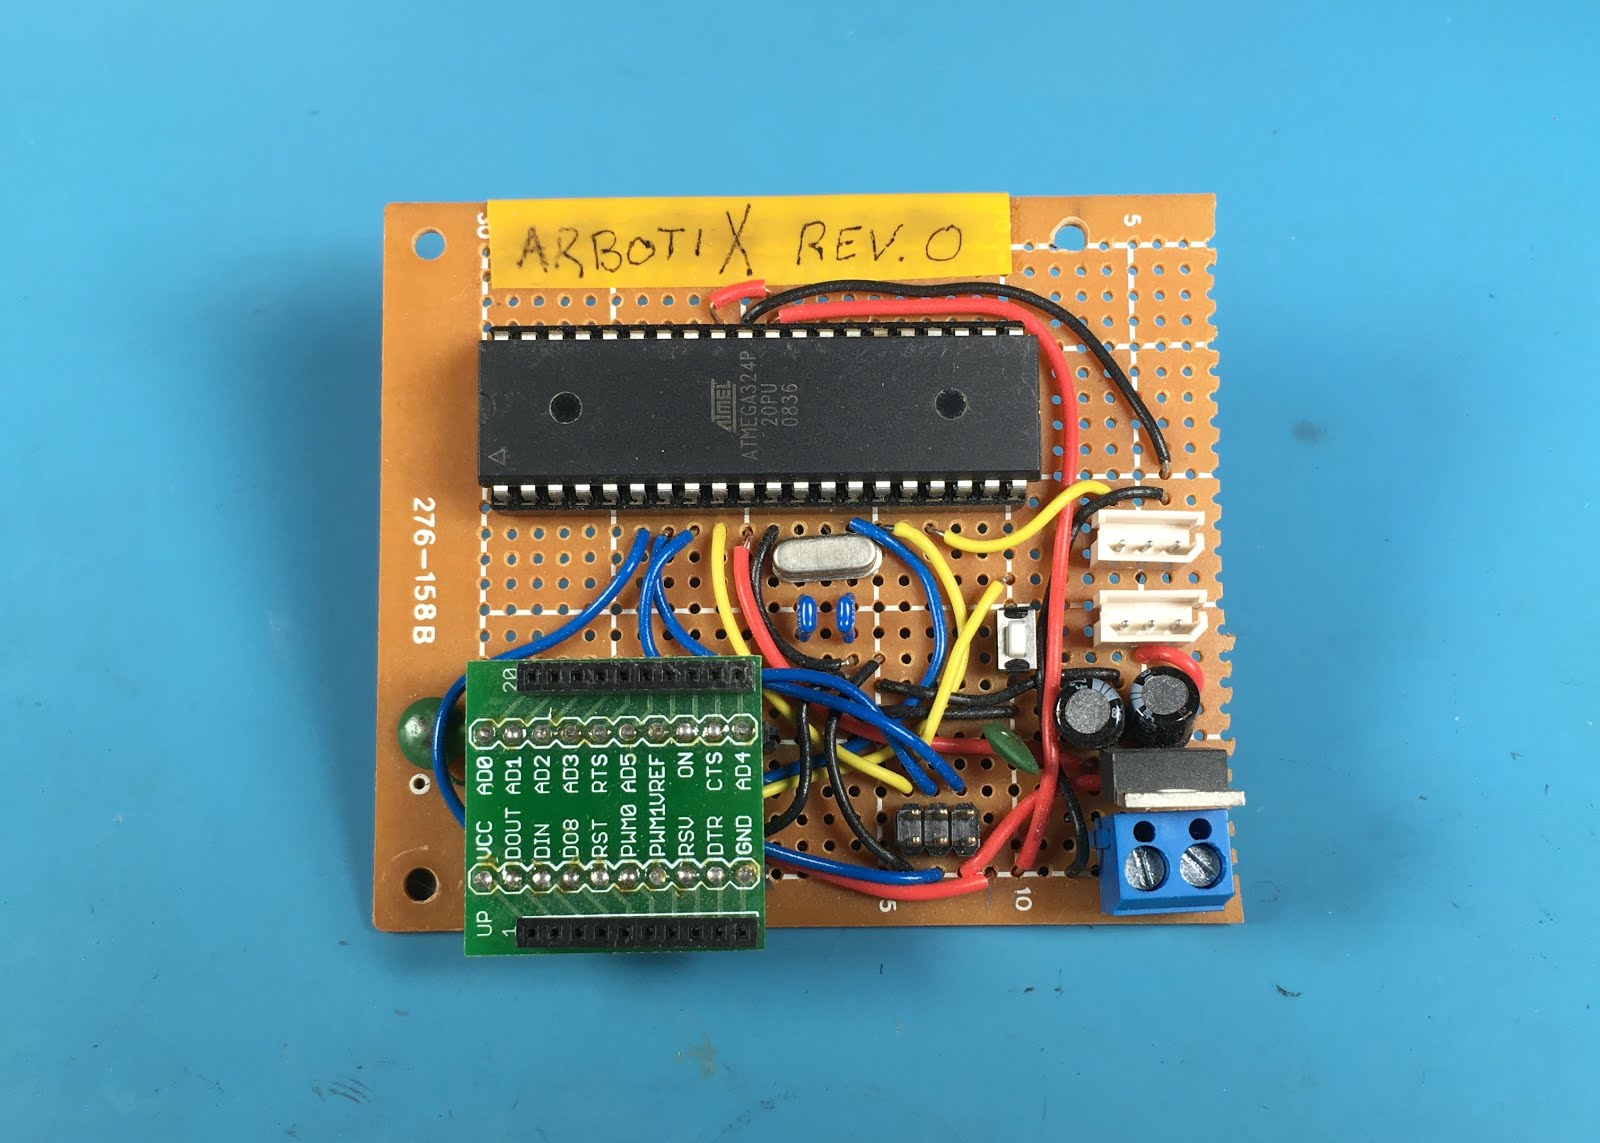
The original ArbotiX (2009)
This is the original ArbotiX prototype. Back in 2009, I was a fairly active member of the Trossen Robotics forums. Andrew Alter had this new little event he called Mech Warfare that they were putting on at RoboGames.

I seem to recall having my first ever phone call with Andrew Alter, and by time it was over having a) signed up to build a scoring system and b) bought a Bioloid kit. I did not promise to show up with a Mech because there was really pretty limited time to work on that during the semester.

Then I showed up with a Mech. And won.

You can read all about how I build IssyDunnYet in the thread over at Trossen Robotics. But this post is about the evolution of the ArbotiX.

IssyDunnYet in a not-done status, sporting the ArbotiX prototype.
The original ArbotiX is really pretty simple, it is an Arduino-based board with hardware support for Dynamixel control and XBEE communications, but the Python-based pose engine, and open source nature, really opened up what you could do with Dynamixel Servos. ArbotiX boards have been used in so many places over the past decade+, everything from Giant Hexapods to Kinematic Sculptures.

The original boards were all through hole parts because I was literally assembling these by hand while working my way through grad school. When the order quantities got high enough, I actually had the board fab guys assemble the parts in China and then I would insert the expensive DIP chips stateside. Eventually, I finished grad school and took a job at Willow Garage - at that point we handed all manufacturing over to Trossen Robotics and wound down Vanadium Labs. Trossen is still selling lots of these little boards today, although they've gone surface mount with the newer ArbotiX-M.

The original ArbotiX and the newer, smaller ArbotiX-M
Also found in my pile of random old boards was the original hand-build prototype of the ArbotiX Commander. It looks quite a bit different from the current generation.

The original production versions of the ArbotiX Commander (left)
and the hand-built prototype (right).
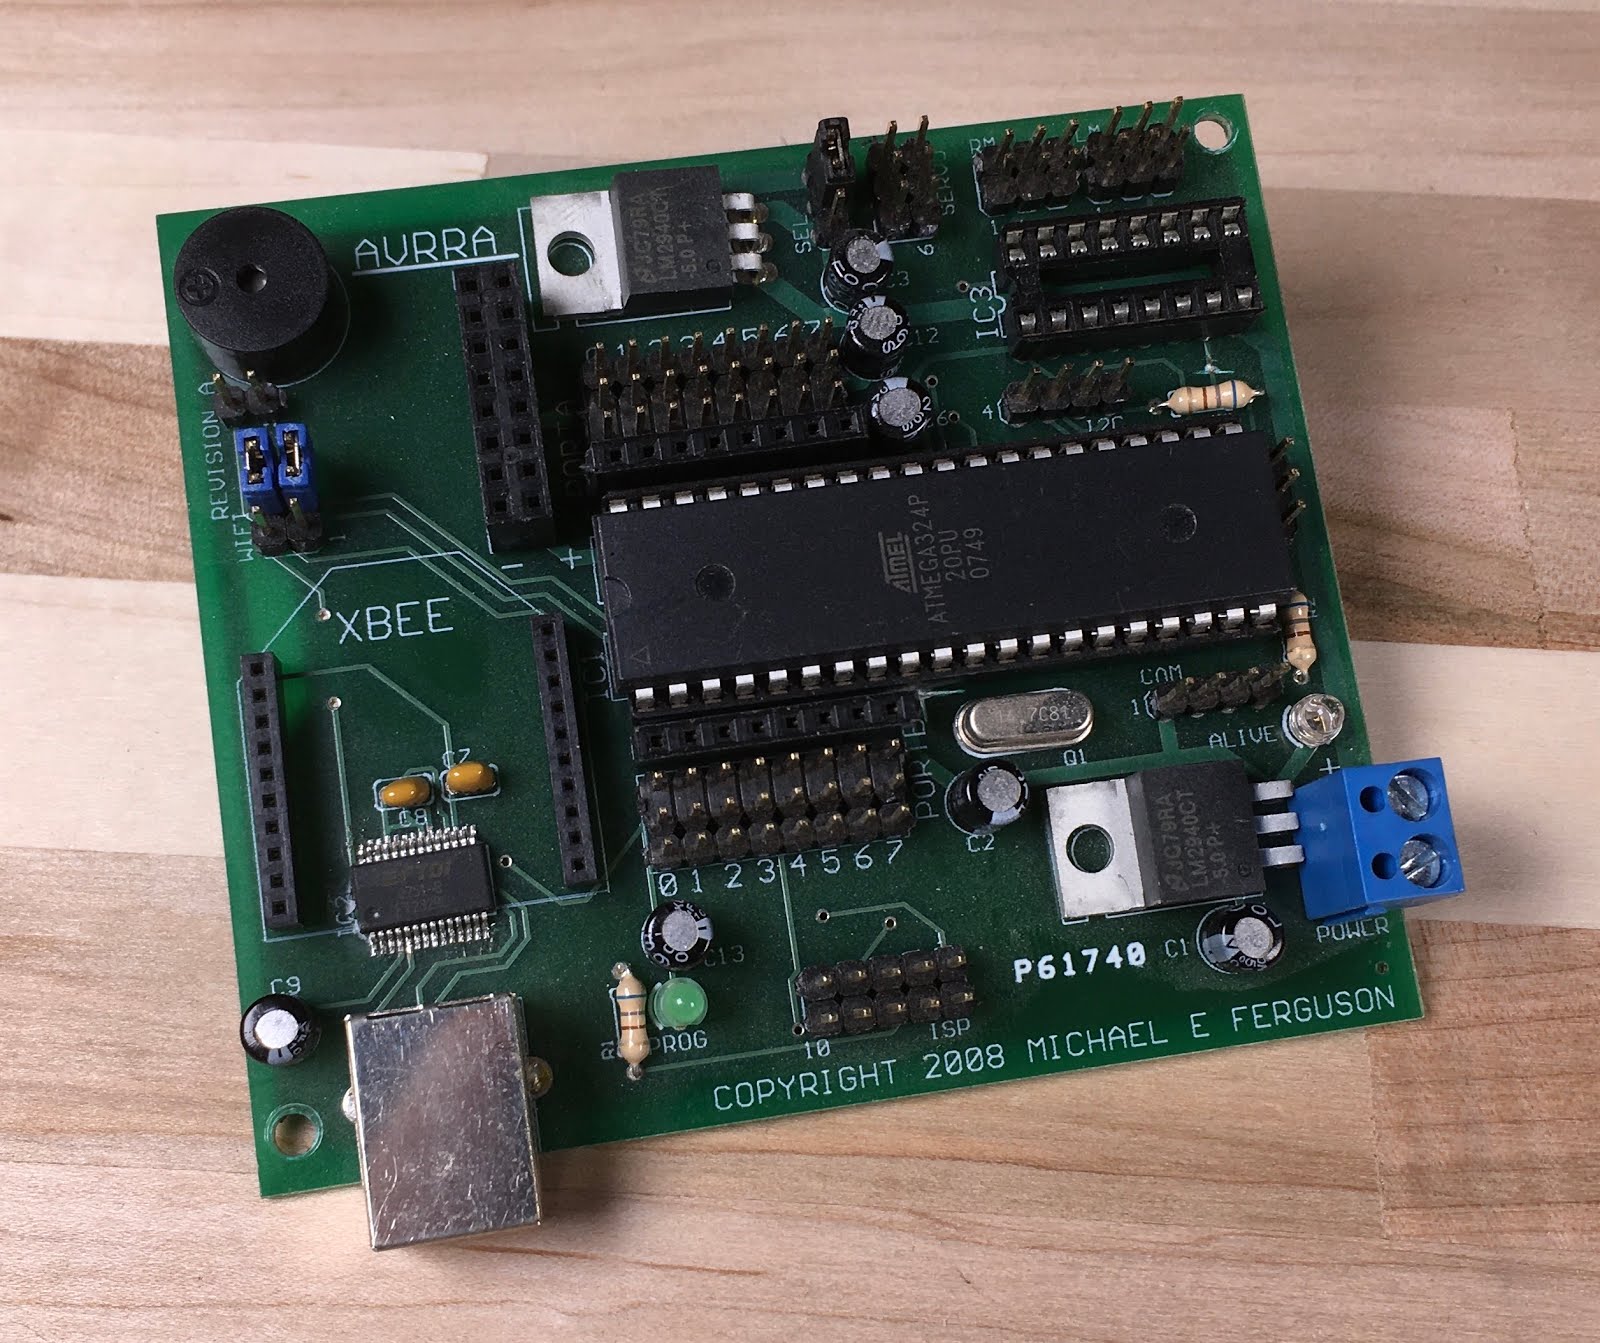
I also came across the spiritual predecessor to the whole ArbotiX lineup, the AVRRA board (AVR Robotics API). This was used in XR-B3 (pretty much my last non-ROS bot).

AVRRA Board (2008)

Sunday, April 5, 2020

PS4 Controller and ROS

It's National Robotics Week! But you should definitely #StayAtHome, so there are no in-person events this week. I already had this (and several other posts) nearly done, so I'm aiming to post something every day this week.

Recently I updated Maxwell to use the PS4 controller. It is not the easiest thing to setup, and I found lots of misinformation out there that either never worked, or no longer works. So here is how I now setup PS4 controllers on Ubuntu Bionic (18.04).

These instructions require no special packages to be installed, we're using the default bluetooth built into the Linux kernel, which should also mean that other bluetooth stuff continues to work (unlike the older ps3_joy ROS package).

To pair the PS4 controller with the robot computer we need to start the controller in "pairing mode". Hold down the SHARE button while pushing the POWER button. Continue to hold both buttons until the LED starts flashing very quickly.

On the computer we will use bluetoothctl to do three things:
  • Turn on the scan - so we can find new devices. This is how we find the MAC address of the wireless controller.
  • Tell the bluetooth controller to trust the wireless controller
  • Tell the bluetooth controller to pair with the wireless controller
Open a terminal on the robot computer and run the following commands that are in RED. Replace the MAC address with the actual device found (I've highlighted in green what the line should look like):

$ sudo bluetoothctl
[NEW] Controller A0:A4:C5:CC:D1:92 velocityXYZ [default]
Agent registered
[bluetooth]# scan on
Discovery started
[CHG] Controller A0:A4:C5:CC:D1:92 Discovering: yes
[NEW] Device A4:AE:11:02:78:BC Wireless Controller
[bluetooth]# trust A4:AE:11:02:78:BC
Changing A4:AE:11:02:78:BC trust succeeded
[bluetooth]# pair A4:AE:11:02:78:BC
Attempting to pair with A4:AE:11:02:78:BC
[CHG] Device A4:AE:11:02:78:BC Connected: yes
[CHG] Device A4:AE:11:02:78:BC UUIDs: 00001124-0000-1000-8000-00805f9b34fb
[CHG] Device A4:AE:11:02:78:BC UUIDs: 00001200-0000-1000-8000-00805f9b34fb
[CHG] Device A4:AE:11:02:78:BC ServicesResolved: yes
[CHG] Device A4:AE:11:02:78:BC Paired: yes
Pairing successful
[bluetooth]# exit

When complete, the PS4 LED should go solid and turn a deeper blue color. You should only have to do this once, and the controller will remain paired until you pair it with another computer.

Once you've got the PS4 controller paired, you'll find out the button mapping is just a little different form the PS3:
  • The common "deadman" button on the upper corner of the joystick (labeled "L1") is index 4 instead of 10.
  • The joystick axis have changed a bit, I had to change axis_linear from 4 to 3.
  • It is probably a good idea to set the autorepeat_rate on the joy node. This prevents stuttering publishing (and movement).
Here's the changes I made to Maxwell to update from the PS3 to the PS4 controller. I use a custom node for converting Joy messages into Twist messages. If you're using the popular teleop_twist_joy package, you'll be using enable_button parameter instead of axis_deadman.

Wednesday, April 1, 2020

Reviving Maxwell (and this blog)


It has been over 5 years since I last posted on this blog - but now seems like a great time to start posting things again!

We will start with an update on Maxwell, my longest running robot, which originally started as my Masters project at SUNY Albany. He's 9 years old now, although the only original parts are the laser cut base, the drive motors, drive wheels, and the the neck:


I don't expect there are many hobby robots out there with such a long lifespan. Here is a summary of Maxwell's evolution:

  • January 2011 - Maxwell is created with an Arbotix, a series of EX-106 and RX-64 servos, Hokuyo URG-04LX-UG01 laser, a Kinect, and a massive Dell laptop.
  • March 2011 - Maxwell gets an Emergency Stop.
  • August 2011 - Maxwell wins the AAAI Small Scale Manipulation Challenge.
  • December 2011 - Maxwell gets a vertical lift so he can reach the ground and the table. Around the same time, the camera got upgraded to an Asus Xtion.
  • Summer 2012 - Maxwell gets upgraded to a MX series servos. I also wrote a three part article about this in SERVO magazine.
  • Summer 2013 - Maxwell gets upgraded to use MoveIt.
  • Fall 2014 - Maxwell gets upgraded to and Intel NUC and the Etherbotix controller, an ARM-based, Ethernet-connected replacement for the ArbotiX I was originally using. I also created lots of documentation so that Alan Downing from HBRC could build a Maxwell clone (ROSwell)
  • Spring 2018 - Maxwell gets a parallel-jaw gripper (more on this below).
  • Spring 2020 - lots of updates.
The first of the new updates is migrating Maxwell to ROS Melodic. The drivers are all updated, and all the warnings have been fixed. I've built a map of the house here in NH (and fixed a major bug in slam_karto in the process):


I've also updated Maxwell to the PS4 controller, since the PS3 doesn't work so great in newer versions of Linux (this will be the subject of a later post).

While the parallel-jaw gripper was physically installed on Maxwell some time ago, and the URDF had been updated, I never actually finished the software to control the gripper -- that's the project for later this week. In the meantime, here are some close up shots of the gripper:


Sunday, September 21, 2014

answers.ros.org: A Quick How-To

Below are 5 steps to getting the most out of ROS Answers, and hopefully giving the most back to the community in the process:

1. Don't be afraid to ask a question

The name of the site may be "ROS Answers", but there is no point in having answers if there are not questions. Often I find that people comment on old questions, or post answers to old questions, hoping to get help for a possibly related problem. Your comments will probably be missed by anyone who did not previously participate in that question/answer thread, and posting an answer with a question is just bad etiquette. If you have a question, open a new question!

2. But before you ask a question, check to see if someone has already asked and answered the exact same thing!

There are over 15,000 18000* questions on ROS Answers. There is a good chance that if you have a common problem, it has already been asked, and probably answered. The average time between posting a question and getting answer is probably several hours, however, if you spend just a few minutes searching the site you might find your answer immediately.

3. If you ask a question -- try to make sure other people will be able to find it some day by adding appropriate tags.

That search thingy in #2 depends on questions being properly tagged. Adding a few (useful) tags will both help get you an answer faster, as well as making sure that the next person with the same question can find your question and the answer to it. "ros" is probably not a useful tag, the name of the package, node, or command in question would be good tags. Including tags for the specific hardware you might be using could also be useful (for instance "kinect" or "pr2")

4. Close button is evil. Karma is good.

This is probably the most misunderstood aspect of ROS Answers. People frequently post a comment saying "thanks, that works" and then click the "close" button on the question instead of selecting an answer. Please don't do this! Instead, click the checkmark next to the question to select the answer to your question. You can only select the answer on questions that you asked, however, if you find an answer to someone else's question that helps you, you can give a little Karma by clicking the "up arrow". The answer to the right here has been upvoted 26 times -- it must be pretty good.

The answers website really depends on Karma. New users have restrictions (unable to post links, images, etc).  New users NEED Karma to become more effective users. Power users need Karma to be able to moderate the site, like retagging those questions where people didn't get the tags right.

5. Finally, make sure somebody can actually maybe answer your question.

Good answers require good questions. If you get an error in the console, certainly include that exact error into the question. A summary of the error, or "I got an error" are not substitutes for the actual error or traceback. Tells us exactly what commands you ran. Other things you probably want to include: what ROS version, operating system, and robot you are running -- and if you aren't running from up-to-date debs from the OSRF apt repo, you probably want to point out how you installed ROS.

* I started writing this post a few days after the 15000th question was posted. I finished writing it 3000 questions later....

Saturday, September 6, 2014

Intel NUC for ROS

This post has been a long time coming -- I think I promised it to several HBRC members at the July SIG...

I've frequently been asked "what computer do you use on your robots?", usually from someone looking at a variety of sub-$100 ARM boards. ARM processors have come a long way, but for a ROS computer, they are not the easiest choice. Austin Hendrix has done a lot of work to get a buildfarm up and running for ARM processors -- but there is still a long way to go and many things will not work "out-of-the-box".
So my choice? Well, it's not under $100, but it is a very fast, fairly low power machine (here, I define low-power in the sub-15W range). The latest generation of Intel NUC (Next Unit of Computing) modules offer quite a few options for small Intel Core-based computers. I'm using the 4th-generation i3-based D34010WYK. This offers quite a bit of compute power for ROS, especially when you consider that early TurtleBots ran on a single-core Atom. I've used 35W TDP i3 processors on a number of mobile manipulation problems and been able to run the OpenNI/OpenNI2-based drivers, the navigation stack and MoveIt! without much difficulty. If you're looking for a bit more processor, there is an i5-based version for $100 more.
Intel NUC (image from Intel NUC website)
These computers are sold as either a board (somewhat hard to find for sale) or as a kit which includes the case. Either option requires memory, hard drive and wifi card to be added. My setup is:
  • 8GB Crucial Ballistix Sport SODIMM. Whatever you choose, be sure it is 1.35V RAM -- the newer NUC models work ONLY with 1.35V RAM (many modules are 1.5V).
  • 120GB Crucial mSATA SSD. Intel offers a larger case version of the NUC that fits a standard 2.5" drive, but the smaller versions only take an mSATA drive.
  • Intel 7260 Wireless-AC Card. This card will work best with Ubuntu 14.04, older versions will need an updated kernel (at least 3.13) to get working drivers. No need for antennas as they are already in the case.
These boards take 12-24V DC input, but are probably most efficient at 19V. I'm powering mine off a 12V battery connected to a Pololu 5A Step-Up Regulator that is configured to output the desired 19V. My batteries will never get even close to 19V even when fully charged, and so the regulator should not have any issues.
I would recommend installing Ubuntu 14.04 and using ROS Indigo for these machines. If you want to use an older Ubuntu distro, you should definitely make sure your wifi card is compatible, because the Ethernet port will not work with the drivers present on the 12.04 installer and you will have to connect to ubuntu.com to update somehow. Another alternative is to look for a NUC based on the 3rd-generation Intel Core processors, but these might be hard to locate.

Sunday, February 23, 2014

It's actually alive!

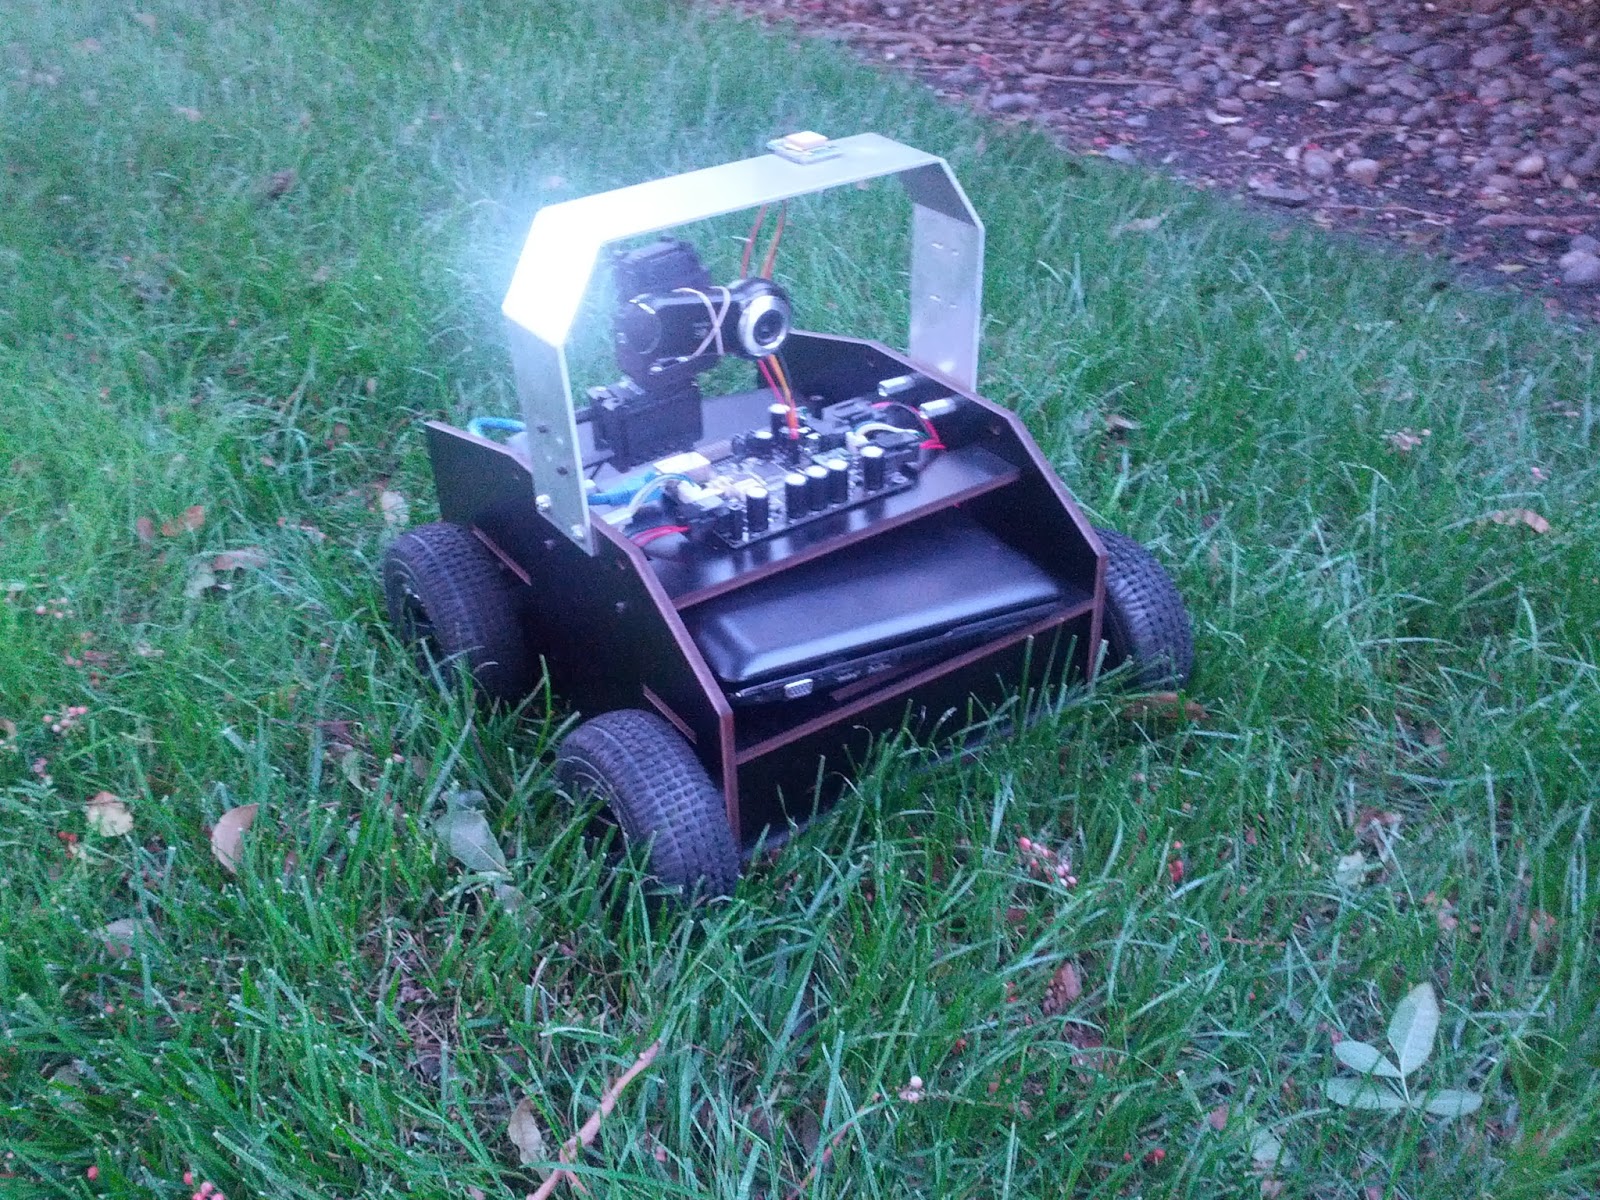
Over a year ago, I posted about my RoboMagellan robot, and then nothing. It's been pretty busy for the past year, but I finally got back to working on this robot. The control board is now mostly functional, and I have integrated the IMU and GPS. I still have to get the tilting laser assembly mounted and working, and come up with a permanent mount for the camera, but earlier today I finally field tested the robot:


Drives well in grass, on pavement, and even has enough gusto to get up onto concrete parking lot wheel stops (although it tends to then get stuck on top of said stop). The forward odometry is good, but I still need to tune the turning odometry.

As far as ROS integration goes, I have the IMU, GPS, and wheels tied into ROS. For decoding the GPS I'm using the nmea_navsat_driver package, which made things quite easy. I'm currently working on some tools for handling localization and visualization while in a GPS coordinate frame (more to come on that, but it is developed on top of geodesy). Code for the project is pretty minimal right now, but is hosted at https://github.com/mikeferguson/robomagellan